This is the hazer we are currently using with our T-14 and our 3 inch square poles/winch system. I wanted a system that was very sturdy and one that allowed for quick removal of just one or all houses if required. This also allows just one section of the T-14 to be installed in the early spring before the martins arrive for trapping of starlings or sparrows. This type of hazer works quite well providing you don't use green wood when building the hazer. If you use wet wood you must allow for shrinkage of the 2X6 board. As the wood dries out and shrinks the holes for the rollers become closer together, causing the rollers to become too close together to turn freely. In severe cases even the weight of a T-14 is not enough to overcome the friction from the binding rollers and the house may have to be pulled down with a rope. If this occurs the holes will need to be enlarged or redrilled in a different location. There may be a simpler way of mounting a T-14 to a square steel pole, but this system has worked very well for us.
I use a pin/bracket setup and two bolts on the 3 room houses. On the larger 4 room houses I use 4 bolts. A simpler alternate setup without the brackets is pictured below.
This design mounts with bolts only. When drilling holes for the rollers be sure the mounting washers and nuts won't interfere with the nestbox trays.
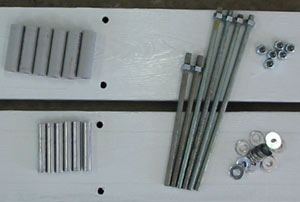
- (2) 2X6 boards - 36" in length
- (2) 3/8" allthread rod - 8"
- (4) 3/8" allthread rod - 9"
- (4) 3/8" allthread rod - 11"
- (6) 1/2" gray pvc rollers - 2 3/4"
- (6) 1/2" OD aluminum tubing - 2 7/8"
- Misc. 3/8" flat washers and nuts
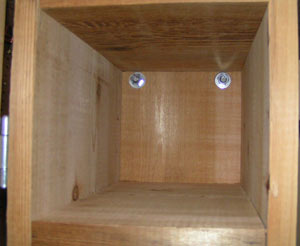
I try to align the mounting hardware at the top of the nestbox to avoid problems with the nestbox trays. This also gives the birds a little more room in the house.
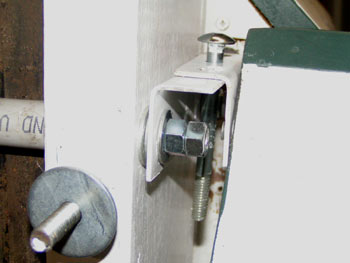
Here is a shot of the roller detail. I use a flat washer on each end of the roller to keep the inside aluminum spacer from digging into the wood.
These are the rollers and hardware required to assemble the hazer. The 4 additional bolts and hardware required to mount the 4 room housing is not shown.
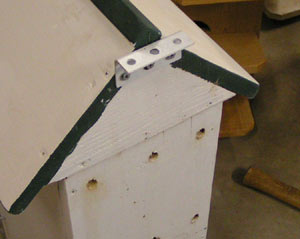
This is the quick release bracket I use on the 3 room housing. A ¼ inch bolt is used as the pin.
3 room house bracket mounting position.
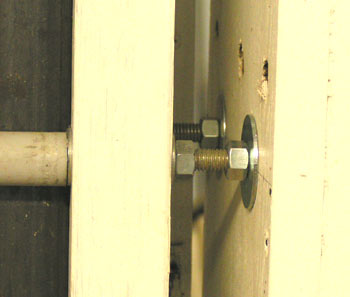
House mounting bolt detail. House spacing is easily adjusted.
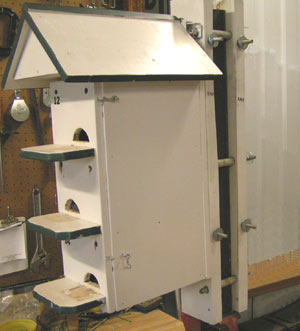
One 3 room house shown bolted in place. One person can easily mount all four rooms to the hazer in just a few minutes.
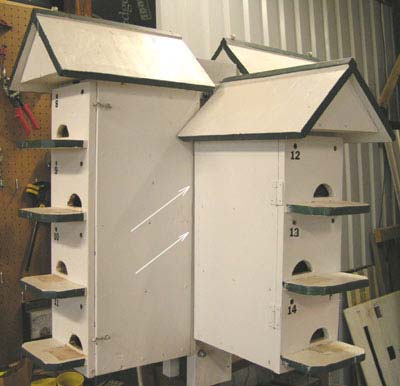
Houses are spaced 3/8 inch apart to reduce wind loading during storms. This also allows better airflow to the back sides of the houses where I have 3 additional vent holes per room. These are drilled at 45º angles and we have never had a problem with the nesting area getting wet during storms. We don't normally open these vent holes up until the temperature tops 95º.
Questions or comments: